Overview
The simplest way to get AgentOS up and running. All platform components run as Docker containers on a single machine using Docker Compose. Best for: Development, small teams, single-server deployments.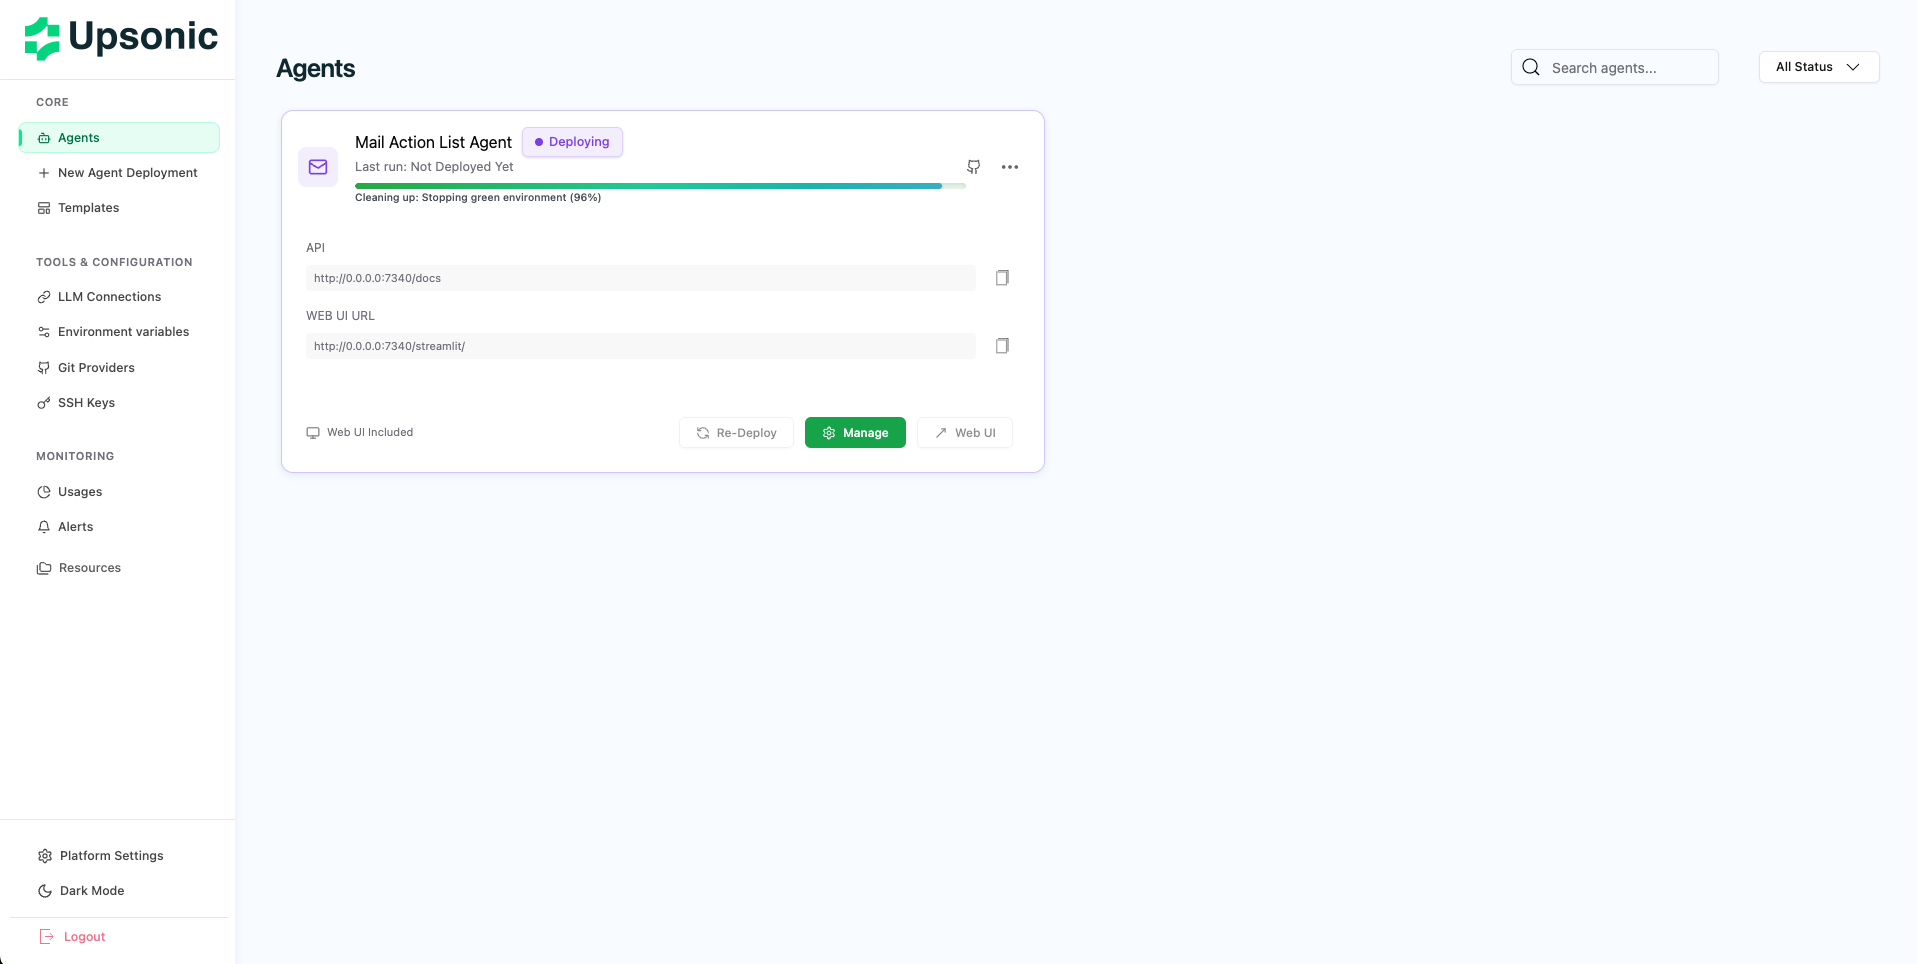
Prerequisites
- Docker (latest version recommended)
- Docker Compose V2
- Minimum 4GB RAM
- Minimum 30GB disk space
Docker Hub Access
Log in to Docker Hub to pull AgentOS images:Start Installation
Download Installation Files
Clone the AgentOS Builder repository:You’ll find
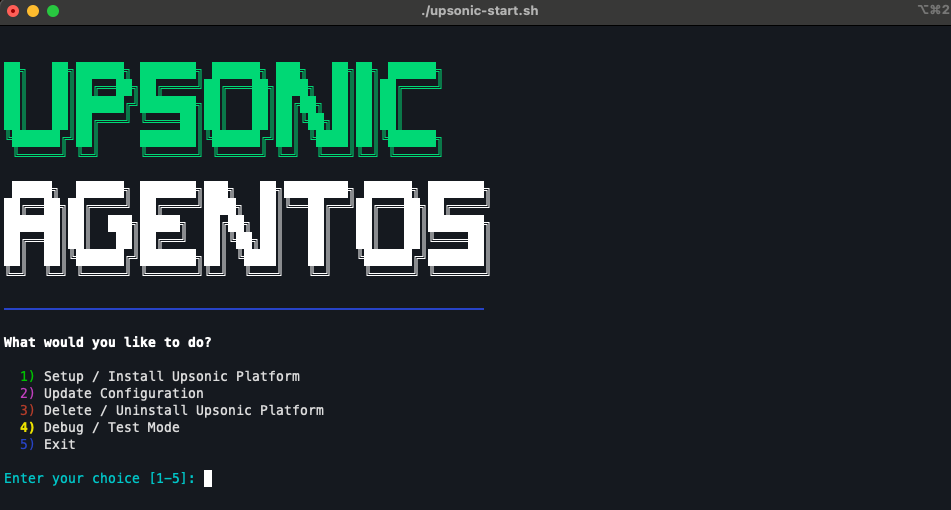
compose.yml and upsonic-start.sh in the repository.Run Installation Wizard
Make the script executable and run it:The wizard will verify prerequisites and guide you through configuration.
Configure Admin Account
Create your admin account:
- Enter admin email address
- Set admin password (minimum 8 characters)
Configure SMTP (Optional)
Configure email notifications:
- Skip: Emails will be logged to console (development mode)
- Configure: Enter SMTP host, port, username, and password for email alerts
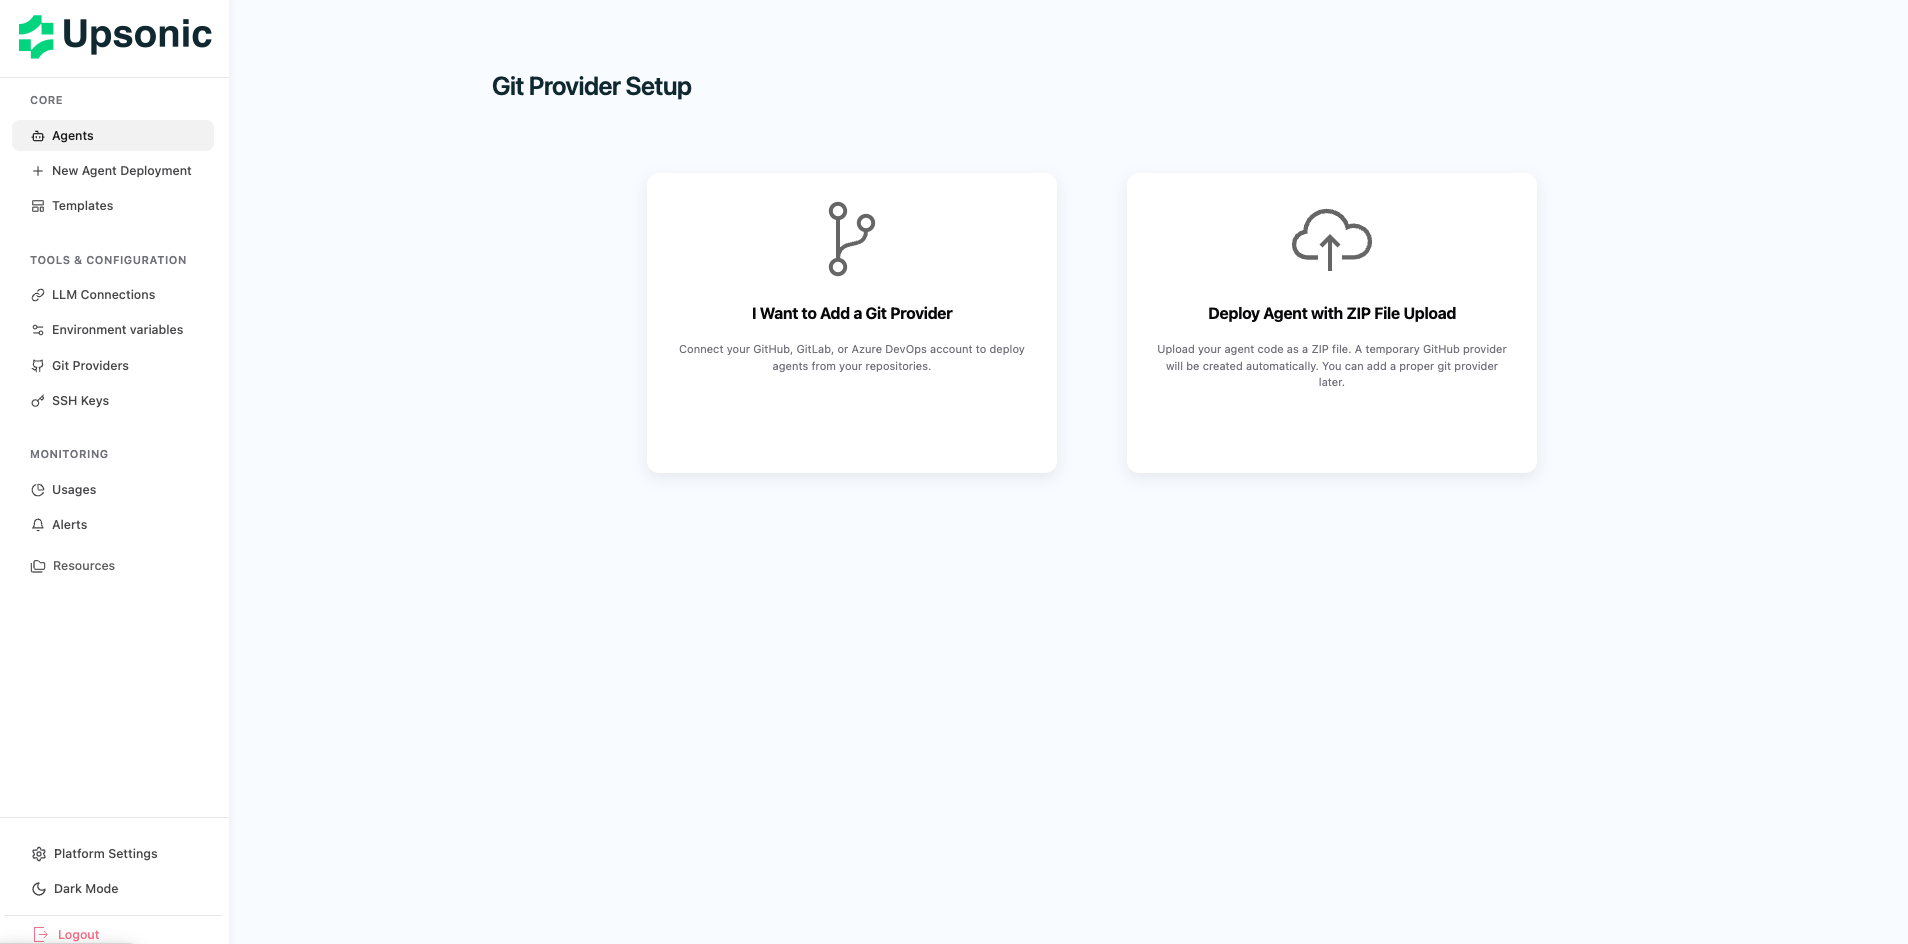
Platform Selection
Choose your system architecture:
- Linux (AMD64) — For Intel/AMD processors
- Mac (ARM64) — For Apple Silicon (M1/M2/M3)
Access Your AgentOS
Once the installation wizard completes, you’ll see the access URL displayed in the terminal. Open your browser and navigate to the URL provided (typicallyhttp://IP:PORT). Log in using the admin credentials you created during installation.